
Made in the USA!
Low, Flat Rate Shipping on All Pre-cut Tint Kits!
Low, Flat Rate Shipping on All Pre-cut Tint Kits!
– Step #1 in our Installation Process –
Inspect your KIT carefully. Verify ALL pieces are correct and in excellent condition.
IMPORTANT: Contact us before beginning your installation if there are any problems.
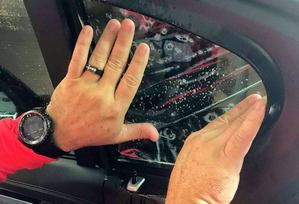
– Step #2 in our Installation Process –
On the CLEAN EXTERIOR of car, hold each piece on or up to the appropriate window to be installed for proper fit. Keep in mind; some extra tint will be hidden in bottom of door gasket and around black (border) areas of other windows. (no need to trim)
– Step #3 in our Installation Process –
Clean interior of windows with soap/water solution. (no chemicals) Scrape all windows with plastic scraper EXCEPT rear windows with a rear defroster. (use scrub pad)

– Step #4 in our Installation Process –
Slip solution should be 95% water 5% baby shampoo.

– Step #5 in our Installation Process –
Place tint on a clean flat wet surface with adhesive side facing up. Slowly peel clear away exposing adhesive side while spraying with slip solution. (apply thoroughly)
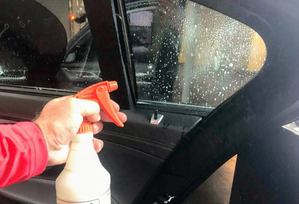
– Step #6 in our Installation Process –
Thoroughly spray inside of window with slip solution and apply tint with wet adhesive side.
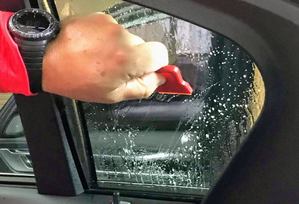
– Step #7 in our Installation Process –
Maneuver tint by sliding into place. Remember to slide behind gasket with push stick. Also, check gaps on sides of doors from exterior for proper alignment.
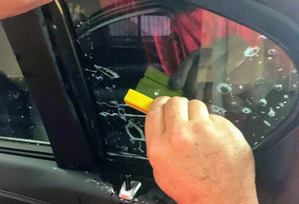
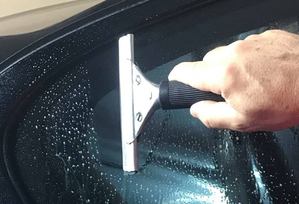
– Step #8 in our Installation Process –
Spray entire area of tint with slip solution and CAREFULLY use squeegee to pull excess water and bubbles to the edges. Repeat slip solution if necessary to allow squeegee to work properly. TIP: Wrap paper towel around hard card to absorb excess water from edges and gasket. This will also help prevent scratches to tint.

– Step #9 in our Installation Process –
IMPORTANT: Do not roll down windows for 2 days. Window tint can take several days to fully cure. There may be hazy/cloudiness and also many “water” bubbles during this process. Leave Alone!!! If any “white” bubbles appear at this point you may press them down.
DISCLAIMER: Almost all rear windows and many door windows require “heat shrinking” to fit properly. All patters are computer cut for perfect fit; however still require this method due to the curve of windows.